Why a Car Wash at Home Beats Waiting in Line
A car wash at home saves money—up to $240 a year compared to bi-weekly commercial washes—and gives you total control over your car’s care.
Quick Answer: What You Need to Know
- Cost Savings: DIY washing eliminates recurring commercial car wash fees
- Better Protection: You choose gentle, pH-balanced products that won’t strip wax or damage paint
- Eco-Friendly Options: Control water usage and use biodegradable soaps
- Attention to Detail: You’ll catch spots that automated systems miss
- Sense of Accomplishment: There’s real satisfaction in seeing your car shine from your own effort
It’s also about protecting your investment. Commercial washes with physical contact can cause micro-scratches, especially on dark paint. At home, you control the products and techniques, ensuring a gentler clean.
However, DIY washing takes time, effort, and the right supplies to avoid causing damage. You’ll need to learn proper techniques like the two-bucket method and understand why household dish soap is your car’s enemy.
This guide will show you the right approach to achieve professional results right in your own driveway.

Weighing Your Options: The Pros and Cons of a Home Car Wash
Considering washing your car in the driveway? It’s a smart move, but it’s important to understand both the advantages and the challenges. Here’s a look at what a car wash at home entails.
DIY Benefits
The main benefit is cost-effectiveness. After an initial investment in quality supplies, each wash costs far less than commercial options. You also get complete control and customization, choosing gentle products and focusing on problem spots that automated systems miss. With proper technique, hand washing is much gentler on your paint, preventing the swirl marks common with harsh automatic brushes. Plus, there’s a real satisfaction in achieving a brilliant shine with your own hands.
DIY Drawbacks
On the downside, a proper home wash is time-consuming, taking one to three hours, and it requires physical effort. There’s also an initial setup cost for quality supplies like buckets, mitts, and proper soap.
The biggest risk is the potential for paint damage. Improper techniques or products can cause the very scratches you’re trying to avoid, a real risk of improper washing techniques that many first-timers don’t realize. Finally, driveway runoff can pollute local waterways, though this can be minimized with the right approach.
A home wash is great if you value control and enjoy the process, but it requires time, effort, and learning the right way to do it.
| Feature | DIY Car Wash at Home | Mobile Professional Detailing |
|---|---|---|
| Cost | Low initial, very low per wash | Moderate to High |
| Time Commitment | High (1-3+ hours) | Low (0-15 min scheduling, 2-4 hrs service) |
| Paint Safety | High (with proper technique/products) | High (professional expertise) |
| Effectiveness | High (detail-oriented) | Very High (specialized tools/skills) |
| Convenience | Moderate (requires effort/setup) | Very High (comes to you) |
| Water Usage | Variable (can be high or low) | Controlled (eco-friendly practices) |
Your DIY Detailing Arsenal: Essential Supplies for a Car Wash at Home
Before starting your car wash at home, gathering the right tools is essential. A one-time investment in these supplies will last for dozens of washes, paying for themselves over time.

Here are the essentials for your detailing arsenal:
- Two-Bucket System: Use one bucket for soapy water and one for rinsing your mitt. Add Grit Traps like the Viking Car Care Bucket with Grit Trap to the bottom of each to trap dirt and prevent scratches.
- pH-Balanced Car Wash Soap: Never use dish soap. A dedicated car soap like Turtle Wax soap is formulated to clean without stripping wax.
- Microfiber Wash Mitt: A microfiber cleaning sponge is gentler than traditional sponges, trapping dirt away from the paint.
- Wheel Cleaner & Brush: Use a dedicated Meguiar’s Ultimate All-Wheel Cleaner and a Mother’s rubberized wheel brush to tackle brake dust.
- Drying Towels: Use large, plush microfiber drying towels or a chamois towel to dry your car without leaving streaks.
- Wax or Sealant: Protect your finish with a long-lasting Turtle Wax paste finishing wax or a quick Meguiar’s Quik Detailer spray wax.
- Hose with Shut-Off Nozzle: A pressurized hose spray nozzle helps conserve water and provides better rinsing power.
- Bug and Tar Remover: For stubborn spots, a product like Rain-X Bug and Tar Gel is essential.
- Interior Supplies: Key items include a mini shop vac, Shout Automotive for carpets, Mother’s VLR for vinyl/leather, and Meguiar’s Quik Interior Detailer for the dash.
- Glass Cleaner: Use an ammonia-free automotive glass cleaner with blue shop paper towels to avoid damaging window tint.
The Best Location for a Car Wash at Home
Always wash your car in a shaded area, never in direct sunlight. Sun and heat cause soap and water to dry too quickly, leaving stubborn water spots and preventing products from working effectively. A cool surface is essential for the best results. Work in a garage, under a tree, or on an overcast day. A concrete or gravel driveway is best for drainage, and ensure your hose can easily reach all sides of the car.
Why You Should Never Use Dish Soap
Using dish soap on your car is a common but damaging mistake. Dish soap is a degreaser that strips away your car’s essential wax and sealant layers. This leaves your paint unprotected from UV rays, acid rain, and other contaminants. Without this protection, the clear coat can dry out and oxidize, leading to a dull, faded appearance that is costly to fix. Dish soaps are also too alkaline (not pH-balanced) for automotive paint, which can break down the clear coat over time. Stick to a proper pH-balanced car wash soap. It’s a small investment that protects your car’s finish. For more tips, see our guide on 3 Ways to Protect Your Car Paint.
The Ultimate 5-Step Guide to a Flawless Finish
Follow these five steps for a flawless finish. The key is patience and proper sequence to avoid streaks, spots, and scratches.

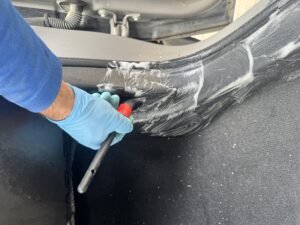
Step 1: Wheels, Tires, and Pre-Rinse
Start with the wheels to avoid splashing brake dust and grime onto clean paint. Rinse the wheels, then spray one at a time with a dedicated cleaner like Meguiar’s Ultimate All-Wheel Cleaner. Let it sit for a few minutes, then scrub all surfaces with a Mother’s rubberized wheel brush and rinse thoroughly. Pre-treat bug splatters with Rain-X Bug and Tar Gel. Finally, give the entire car a thorough top-to-bottom rinse to remove loose dirt.
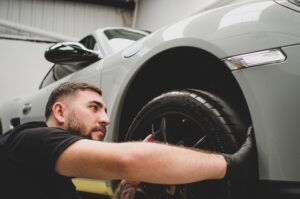
Step 2: The Two-Bucket Hand Wash
The two-bucket method is the best way to prevent scratches. Fill one bucket with soapy water and the other with clean rinse water, placing a grit trap in each. Start washing from the top down. Dip your microfiber wash mitt in the soap, wash a small section in straight lines (not circles), then rinse the mitt in the clean water bucket. This process keeps dirt from being reapplied to your paint.
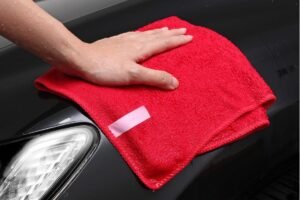
Step 3: Rinse and Dry Like a Pro
Proper drying is crucial to prevent water spots. Do not let the car air dry.

Give the car a final, top-to-bottom rinse. Immediately use a chamois towel or large microfiber towels to dry the surface with a patting or gentle pulling motion. Don’t forget to open doors, the trunk, and the hood to dry all jambs and channels where water hides.
Step 4: Protect Your Paint with Wax or Sealant
Washing removes dirt, but waxing protects the shine and adds a barrier against UV rays and contaminants. For long-lasting protection, apply a paste wax like Turtle Wax paste finishing wax with an applicator sponge. Work one panel at a time, let it haze, then buff off with a clean microfiber cloth. For a quicker option, use a spray wax like Meguiar’s Quik Detailer. Before waxing is the time to address minor blemishes with a product like Meguiar’s Scratch X 2.0. For more on protection, see our guide on 3 Ways to Protect Your Car Paint.
Step 5: Finishing Touches
These final details complete the showroom look. Clean windows inside and out with an ammonia-free automotive glass cleaner. Apply Armor All Tire Shine to tires, restore faded plastic with Meguiar’s Ultimate Black, and polish chrome with Mother’s All-Chrome. For the interior, vacuum thoroughly, use Shout Automotive on carpet stains, and clean surfaces with products like Mother’s VLR and Meguiar’s Quik Interior Detailer.
Leveling Up: Eco-Concerns and When to Call for Backup
A car wash at home is rewarding, but it’s important to consider its environmental impact and know when a job is best left to professionals.
Environmental Impact
Washing your car in the driveway can send soap, oil, and grime into storm drains, which often lead directly to local waterways without treatment. This runoff is a significant source of water pollution. You can minimize your impact by using a shut-off nozzle to conserve water, choosing biodegradable, phosphate-free soaps, and washing on grass or gravel, which act as natural filters. Find more tips in our guide on Eco-Friendly Car Cleaning.
When DIY Isn’t Enough
A home wash is great, but sometimes you need a professional to protect your investment. Call for backup for:
- Deep scratches or severe paint damage: Anything beyond a minor scuff needs professional compounding to avoid damaging the clear coat. Our Scratch Removal & Paint Buffing Services can safely restore your paint.
- Stubborn stains and persistent odors: Professionals have steam cleaners and extractors to tackle deep-set issues. Learn more in our guide on Interior Car Detailing: Stubborn Stains & Odors.
- Lack of time or equipment: A full detail takes hours and requires space and tools. A mobile detailer saves you time and effort.
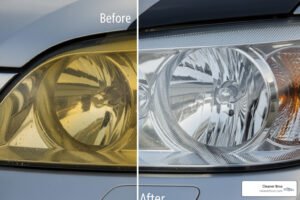
- Specialized treatments: Services like ceramic coatings and headlight restoration require professional training and tools.
- Boosting resale value: Professional detailing can significantly increase your car’s value when it’s time to sell.
Considering the time, equipment, and expertise, asking is a professional detailing worth the money? often leads to a clear ‘yes,’ especially for deeper cleans or when life gets busy.
Frequently Asked Questions about Washing Your Car at Home
Here are answers to some common questions about the DIY car wash process.
How often should I wash my car at home?
A good rule of thumb is to wash your car every 2-4 weeks, but frequency depends on your environment and driving habits. Wash more often to remove corrosive substances like bird droppings, tree sap, and winter road salt. Daily commuters will also need more frequent washes than garage-kept cars. If your car looks dirty, it’s time for a wash to protect the paint. For summer-specific concerns, check out our guide on How to Protect Your Car During a Summer Heat Wave.
Are there any environmental considerations for a car wash at home?
Yes. The main concern is water runoff pollution, as dirty, soapy water flows into storm drains that lead to local waterways. To minimize your impact, use biodegradable soaps, conserve water with a shut-off nozzle, and try to wash on a permeable surface like grass instead of concrete. For more details, visit our guide on Eco-Friendly Car Cleaning.
What are the most common mistakes to avoid?
Even with good intentions, it’s easy to damage your car’s finish. Avoid these common mistakes:
- Washing in direct sunlight: This causes water spots and makes products dry too quickly. Always work in the shade on a cool surface.
- Using one bucket: A single bucket contaminates your wash mitt with dirt, causing scratches. Always use the two-bucket method.
- Using dish soap: It strips protective wax and dries out your paint. Only use pH-balanced car wash soap.
- Dropping your wash mitt: If your mitt hits the ground, it picks up abrasive grit. Clean it thoroughly or get a new one to avoid scratching your paint.
- Air drying: This leaves mineral deposits (water spots). Always dry your car immediately with clean microfiber towels.
Conclusion
A car wash at home is more than just saving money; it’s about taking control, protecting your investment, and the satisfaction of a job well done. By following the steps in this guide—from the two-bucket method to applying a protective wax—you can achieve a showroom shine while preserving your car’s paint and value.
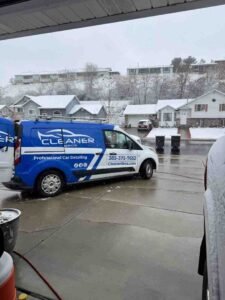
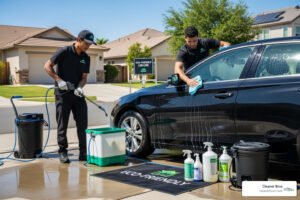
We also know life gets busy. Sometimes you face deep scratches, stubborn stains, or simply lack the time for a thorough detail. For those times, a professional mobile detailing service is the perfect solution. Cleaner Bros brings the expertise, eco-friendly products, and professional-grade tools right to your doorstep, saving you time and hassle.
Whether you DIY or call in the pros, taking care of your vehicle is what matters. Your car works hard for you, and it deserves to look its best.
Ready to experience what professional mobile detailing can do? Get a professional car detailing service in Orem and let Cleaner Bros bring the showroom shine to you.