Why Regular Car Seat Cleaning is Crucial for Your Family’s Health
Car seat cleaning is more than just aesthetics—it’s a critical health and safety issue for your family.
Quick Guide to Car Seat Cleaning:
- Always check your car seat’s manual first – improper cleaning can damage safety features
- Use only mild soap and water – avoid bleach, vinegar, and harsh chemicals
- Never machine wash harness straps – spot clean only to preserve strength
- Air dry completely – prevent mold and rust
- Deep clean every 2-3 months – more often with heavy use
The numbers are shocking: child car seats harbor twice as many dangerous germs as an average toilet. Scientists have found over 100 different strains of bacteria, including E. coli and salmonella, lurking in car seats. Spilled juice, crumbs, and sticky fingers turn your child’s car seat into a breeding ground for harmful bacteria.
However, cleaning a car seat the wrong way can be just as dangerous as not cleaning it at all. Improper methods can weaken safety straps, damage buckles, strip away flame retardants, and compromise the structural integrity that protects your child in a crash. With more than 50 percent of car seats installed incorrectly, cleaning mistakes only add to the risk.
This guide will walk you through the safe, effective way to clean your car seat, protecting both your child’s health and their safety.

Before You Start: Safety First and Gathering Your Supplies

Your child’s car seat is engineered for protection in a crash, which is why car seat cleaning requires care—one wrong move can compromise its safety features. The golden rule: always check your car seat’s instruction manual before you start cleaning. Each model has specific instructions for its fabric, straps, and frame. If you’ve lost the manual, you can usually find a PDF version on the manufacturer’s website.
What are the safety considerations when cleaning a car seat?
Using the wrong products or methods can make your car seat less safe. Here’s how:
- Weakened Harness Straps: Harsh chemicals and submersion in water can break down the elastic fibers in the straps, reducing their strength.
- Damaged Plastic: Certain cleaners can make plastic brittle, causing it to crack in a crash instead of absorbing impact.
- Stripped Flame Retardants: Harsh cleaners wash away the special fire-resistant treatments on the fabric.
- Rust and Corrosion: Improper drying can cause metal buckles and adjusters to rust, leading to failure.
- Incorrect Reassembly: Even with perfect cleaning, reassembling the seat incorrectly renders it unsafe. With more than 50 percent of car seats installed incorrectly, this is a major risk. Take photos during disassembly to guide you later.
Cleaning Products to Use (and What to Avoid)
The safest approach is surprisingly simple: mild soap and water are your best friends. Use a mild, non-toxic soap (like unscented baby soap or gentle dish detergent) mixed with warm water. Unscented baby wipes are also great for quick spot cleaning.
Stay far away from bleach, vinegar, Lysol, Febreze, Clorox, and even baking soda. These harsh products can weaken straps, damage plastic, and strip away flame retardants. The chemical residue can also irritate your child’s sensitive skin.
Essential Cleaning Supplies
Gather these tools before you begin:
- Vacuum with attachments (especially a crevice tool)
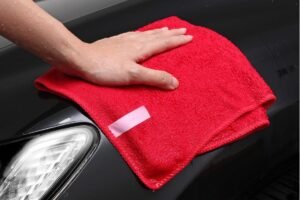
- Soft cloths or microfiber towels
- An old toothbrush (clean, no toothpaste)
- Two buckets (one for soapy water, one for rinsing)
- Clean towels for drying
- Your camera or smartphone to document disassembly
- Mild, non-toxic soap
The Ultimate Step-by-Step Guide to Car Seat Cleaning
This guide walks you through a thorough and safe car seat cleaning. The most important tip: document everything. Take photos and videos as you disassemble the seat. This visual guide is crucial for correct reassembly.

Step 1: Disassemble and Vacuum
Remove the car seat from your vehicle and find a good workspace, preferably outdoors. Shake the seat vigorously to dislodge loose debris. Then, using a vacuum with a crevice tool, thoroughly clean every surface. Removing all dry debris first makes the next steps much more effective. Use an old toothbrush to loosen stubborn particles before vacuuming them away. For extra tips on dealing with pet fur, check out our guide on removing pet hair.
Step 2: Cleaning the Fabric Cover
Check the manual first. Some covers are machine-washable, while others are hand-wash only. Ignoring these instructions can damage the cover and strip its flame-retardant properties.
If machine washing is allowed, use a gentle cycle with cold water and a mild detergent. Never use a machine dryer; always air dry the cover completely. High heat will damage the fabric and its safety features.
For hand-wash only covers or for spot cleaning, use a damp cloth with a mild soap solution. Gently blot the stain without saturating the fabric. For stubborn stains, work the soapy solution in, then rinse with a clean, damp cloth to remove all residue. For more help, see these tips for removing tough stains.
Step 3: How to Clean Car Seat Harnesses and Buckles
This step is critical for safety. Never submerge or machine wash the harness straps. Doing so weakens the fibers that absorb impact forces. Instead, gently wipe the straps with a damp cloth. If your manual permits, you can use a very mild soap solution. Use a toothbrush with water to clean food particles from the chest clip crevices. If straps are heavily soiled, contact the manufacturer for replacements.
To clean the buckle, check if your manual allows removal. If so, rinse it under warm running water while pressing the red button repeatedly to flush out debris. Do not use soap unless specified. Immediately hang the buckle to dry completely to prevent rust. After drying, test the buckle to ensure it clicks securely and releases smoothly. If it doesn’t, contact the manufacturer.
Step 4: Scrubbing the Plastic Frame and Hard-to-Reach Areas
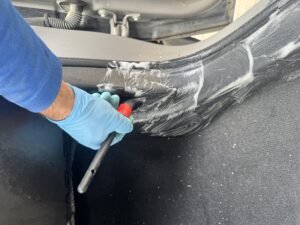
With the cover removed, wipe down all plastic surfaces of the shell and base with a damp cloth and mild soap solution. Use an old toothbrush to scrub tight grooves and corners. For deep crevices, a pro trick is to wrap a damp rag around the end of a flathead screwdriver. Rinse all surfaces with a clean, damp cloth to remove soap residue, then dry thoroughly with a towel, paying close attention to any metal parts to prevent rust. At Cleaner Bros, we champion eco-friendly car cleaning practices you can use at home.
Step 5: Drying and Reassembly
Proper drying is essential to prevent mold and rust. Air dry all fabric pieces completely, preferably in a sunny, well-ventilated area. Be patient, as this can take several hours. Ensure every component is bone dry before reassembly.
As a final reminder: never use a machine dryer. The high heat will ruin the materials and their safety features.
Once everything is dry, use your photos and the car seat manual to reassemble the seat slowly and carefully. Double-check the strap routing. This is critical for safety. Ensure straps follow the correct path with no twists, and that the chest clip sits at armpit level. Incorrect routing is a common and dangerous mistake.
Perform a final inspection: tug the straps, test the buckle, and visually compare the seat to your manual’s diagrams. If the process feels overwhelming, professional help is available from services like Cleaner Bros.
Maintenance, Professional Help, and When to Replace Your Seat
Maintaining a clean car seat requires a consistent routine. Knowing when to clean, when to call a professional, and when to replace the seat is key to keeping your child safe and comfortable.

How Often Should You Perform Car Seat Cleaning?
Cleaning frequency depends on usage. For light cleaning, address spills as they happen with a quick vacuum and spot clean to prevent bigger messes.
A deep clean, where you remove the cover for a full scrub, should be done every two to three months, or more often with heavy use. Tackle major messes like vomit or a diaper blowout immediately. While experts recommend deep cleaning at least twice a year, kids often necessitate a more frequent schedule.
When to Replace a Car Seat Instead of Cleaning It
Sometimes, a car seat cannot be safely cleaned and must be replaced. Your child’s safety is the top priority. Replace your car seat under these conditions:
- After a Crash: Replace the seat after any crash, even a minor one. Internal damage may not be visible but can compromise safety. Follow the National Highway Traffic Safety Administration provides specific guidance on car seat use after a crash.
- If It’s Expired: Car seats have an expiration date, usually stamped on a label. Plastic degrades over time, and safety standards evolve. Always replace an expired seat.
- Damaged Straps or Frame: Fraying straps or cracks in the plastic frame are serious safety hazards, not just cosmetic issues. Replace the seat immediately.
- Stubborn Mold: Mold that has penetrated the foam is nearly impossible to remove and poses health risks. If mold persists after cleaning, replace the seat.
Considering Professional Car Seat Cleaning Services
If you lack the time for a deep clean, professional car seat cleaning services are a great solution.
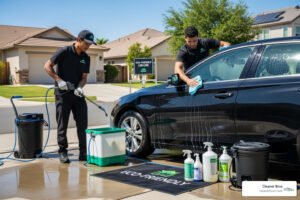
- Saves Time: Our mobile service at Cleaner Bros comes to you throughout Utah County, including Orem, Provo, and Lehi, so you can enjoy your weekend.
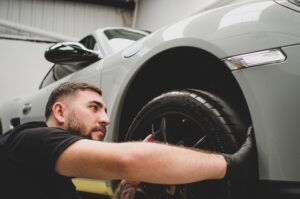
- Deeper Clean: We use professional equipment like steamers and extractors to remove dirt, bacteria, and allergens from deep within the foam padding.
- Handles Tough Messes: Professionals excel at removing tough stains and odors. Our specialized interior detailing services can eliminate even the most persistent messes.
- Safety is Priority: We understand car seat regulations and use eco-friendly, child-safe products. We ensure your seat is returned spotless and correctly reassembled for your peace of mind. Learn more about our professional car seat shampoo cleaning in Utah County.
Frequently Asked Questions about Car Seat Cleaning
Here are answers to common questions about car seat cleaning.
Can I use a steam cleaner on my car seat?
While professionals often use steam, it can be risky for DIY cleaning. Always check the manufacturer’s manual first, as many brands warn against it. The risks of using a home steamer include:
- High Heat Damage: Too much heat can damage plastic components, weaken fabrics, and affect flame retardant properties.
- Excess Moisture: Without professional extraction equipment, the leftover dampness can lead to mold and mildew.
Professionals use commercial-grade equipment with precise temperature controls and extraction capabilities to clean safely and effectively. For peace of mind, leaving steam cleaning to the pros is the safest option.
How do I get a persistent bad smell out of a car seat?
For lingering odors from spills or sickness, start with a thorough cleaning of every component, using a toothbrush to scrub all crevices where bacteria hide. Next, air dry the seat in direct sunlight, as UV rays are a natural deodorizer.
If the smell persists, you can try sprinkling baking soda on the dry fabric cover (but not the harness straps), letting it sit for a few hours, and then vacuuming it up thoroughly. Test this on a hidden spot first.
When all else fails, it’s time for professional help. At Cleaner Bros, our specialized odor elimination treatments neutralize odors at the source using child-safe, eco-friendly methods, rather than just masking them.
Are third-party car seat covers or liners safe to use?
Unfortunately, the answer is almost always no, they are not safe.
Car seats are crash-tested as a complete system. Aftermarket products are not part of this testing and can dangerously interfere with the seat’s performance in an accident. They can prevent a snug harness fit, create a slippery surface, or alter how impact forces are absorbed.
The only safe approach is to use only manufacturer-approved accessories. If you need a replacement cover, purchase one directly from your car seat’s manufacturer to ensure it has been tested for your specific model. When it comes to car seats, safety always trumps convenience, which is why proper, regular car seat cleaning is so important.
Conclusion: Keep Your Child’s Ride Safe and Spotless
You’re now equipped to tackle car seat cleaning. This process is fundamentally about safety first. Every choice, from the products you use to how you reassemble the seat, directly impacts your child’s protection on the road.
The golden rule is to follow the manual. It’s your roadmap to cleaning the seat safely. When in doubt, refer to it or contact the manufacturer.
Clean regularly. A quick spot clean for spills and a deep clean every few months will keep the seat in great shape and prevent small messes from becoming health hazards.
We know life with kids is busy, and finding time for a meticulous car seat cleaning can feel impossible. That’s why Cleaner Bros was started—to give busy Utah County families their time back while ensuring their vehicles are safe and healthy. When you need a professional touch, we bring our eco-friendly, expert service to your driveway, handling every detail with care.
For a professional, safe, and convenient clean that comes to you anywhere in Utah County—from Orem to Lehi—trust the experts at Cleaner Bros. Learn more about our professional car seat shampoo cleaning in Utah County and let us handle the deep cleaning while you focus on making memories with your little ones.
Here’s to safer, cleaner, and happier rides for your family!