Why Deep Interior Car Cleaning Matters More Than You Think
Deep interior car cleaning is a comprehensive process that goes far beyond a quick vacuum and wipe-down. It’s about carefully removing dirt, grime, allergens, and contaminants from every surface of your vehicle’s interior—from carpets and seats to vents and door panels—to restore that fresh, like-new feeling.
What makes deep interior car cleaning different from regular cleaning:
- Regular cleaning focuses on visible dirt and surface-level tidying
- Deep cleaning tackles hidden contaminants in upholstery, air vents, and hard-to-reach crevices
- Deep cleaning addresses odors at their source, not just masking them
- Deep cleaning includes shampooing, extraction, and conditioning of various materials
- Deep cleaning typically takes 2-5 hours depending on vehicle condition
There’s something undeniably satisfying about the feeling of driving a clean car. As one mobile detailing customer put it, “It’s not just about aesthetics; maintaining a clean vehicle offers various practical and health benefits.”
And they’re right. Your car’s interior is where you spend your time—not admiring the paint from the outside. Yet many car owners focus exclusively on exterior appearance while neglecting the space where they actually sit, breathe, and drive.
Over 50% of automotive service purchases are made by women drivers, and research shows they’re particularly sensitive to interior cleanliness and comfort. But regardless of who’s behind the wheel, a deep interior clean delivers benefits that matter to everyone.
The health benefits alone are compelling. Dust, allergens, bacteria, and mold can accumulate in carpets, upholstery, and ventilation systems over time. These contaminants can significantly impact your vehicle’s air quality. Regular deep cleaning removes them, improving the air you breathe and reducing potential respiratory issues—especially important if you or your passengers have allergies.
Then there’s the practical side. Dirt and grime don’t just look bad—they actually degrade your car’s interior materials. Coffee spills, UV exposure, and accumulated dust can permanently damage leather, fade fabrics, and crack plastics. A deep clean helps preserve these materials, maintaining your vehicle’s resale value.
And finally, there’s the psychological boost. A clean, organized interior reduces stress and makes every drive more pleasant. It’s harder to feel put-together when you’re surrounded by clutter and grime.
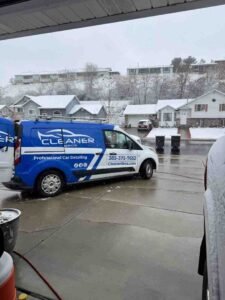
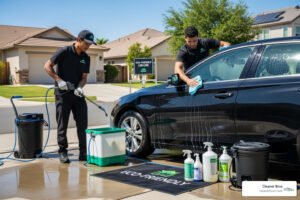
This guide will walk you through everything you need to know about deep interior car cleaning—whether you tackle it yourself or hire a professional mobile detailer to bring the service to your driveway.

Gather Your Arsenal: Essential Tools and Products
Before you roll up your sleeves for a deep interior car cleaning, let’s talk about gathering your supplies. Think of it like preparing for any important project—having the right tools makes all the difference between frustration and satisfaction.
Here’s the thing: using the wrong products can actually damage your car’s interior. That dashboard cleaner under your kitchen sink? It might contain harsh chemicals that can crack your vinyl or leave a sticky residue. And those ammonia-based glass cleaners? They can permanently damage tinted windows and ruin the coatings on your infotainment screen.
So what should you have on hand?

A powerful vacuum cleaner is your foundation. Whether you choose a shop-vac with serious suction or a quality handheld vacuum with attachments, you need something that can reach between seats, under floor mats, and into all those crevices where crumbs and dirt love to hide. An 18-foot power cord and specialized car nozzle attachments make the job much easier.
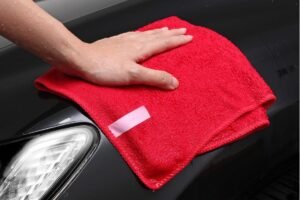
Microfiber cloths are absolute game-changers for detailing. They’re absorbent, lint-free, and gentle on surfaces. Stock up on plenty of them—you’ll want separate ones for cleaning, buffing, and glass work. They’re washable and reusable, which makes them both economical and eco-friendly.
Detailing brushes come in different sizes and stiffness levels for good reason. Soft-bristle brushes work beautifully on dashboards, vents, and delicate trim. Stiffer brushes help work cleaning solution into fabric seats and carpets. And those tiny detail brushes? They’re perfect for getting into tight spots around buttons, seams, and air vents. A great set of detailing brushes makes the intricate work so much easier.
Scrub pads provide extra agitation for stubborn grime on hard surfaces without scratching. You’ll also want buckets for mixing solutions and rinsing cloths—this prevents you from spreading dirt around rather than removing it.
Essential tools for a DIY deep interior car cleaning
If you’re ready to tackle this project yourself, here’s your focused shopping list:
- Shop-vac or handheld vacuum with various attachments
- Detailing brushes in multiple sizes and stiffness levels
- Scrub pads for tough spots
- Microfiber towels (get at least 6-8 to start)
- Buckets for clean water and solution mixing
Recommended cleaning products
Now for the products themselves. Quality matters here because the wrong chemical can do permanent damage.
A pH-neutral all-surface cleaner is your workhorse. It should be safe for leather, vinyl, plastic, and other interior surfaces. The key word is “pH-neutral”—this means it won’t strip protective coatings or dry out materials. Apply it to your cloth rather than spraying directly on surfaces to avoid oversaturation and chemical damage.
Fabric and upholstery cleaner is essential for cloth seats and carpets. Look for something designed specifically for automotive use. These cleaners lift dirt and stains while minimizing water use—important because too much moisture can lead to mold growth or bring old stains back to the surface.
Leather cleaner and conditioner work as a team. The cleaner removes dirt without damaging the protective clear coat on modern leather. The conditioner keeps the leather supple and prevents those heartbreaking cracks that develop over time. Always use pH-balanced products specifically formulated for automotive leather—leather conditioning services can help if you’re unsure about doing it yourself.
Ammonia-free glass cleaner is non-negotiable. Ammonia can damage window tint and destroy the anti-glare coatings on your dashboard screens. Choose products specifically labeled as ammonia-free and designed for automotive glass.
What to avoid: This is just as important as what to use. Household cleaners like bleach, Formula 409, or other harsh chemicals can permanently damage leather, set stains into fabric (rather than removing them), and crack or discolor plastic trim. And those ammonia-based products we mentioned? They’re particularly problematic for modern cars with tinted windows and sensitive electronics.
When in doubt, stick with products specifically designed for automotive interiors. They’re formulated to be effective without causing damage—and that peace of mind is worth the investment.
Your Step-by-Step Guide to Deep Interior Car Cleaning
Alright, you’ve got your tools ready and your cleaning products lined up. Now comes the fun part—actually changing your car’s interior from “yikes” to “wow!” The secret to an effective deep interior car cleaning is working systematically. We always start at the top and work our way down, which prevents clean areas from getting dirty again as debris falls.

Think of it like cleaning a house—you wouldn’t mop the floor before dusting the shelves, right? The same logic applies here.
Step 1: Declutter and Thoroughly Vacuum
This first step might seem obvious, but you’d be surprised how much stuff accumulates in a car. We’ve found everything from forgotten gym socks to petrified french fries wedged under seats!
Start by removing everything that doesn’t belong. Grab all the trash, water bottles, receipts, and personal items. Check the door pockets, under the seats, in the center console, and anywhere else things might be hiding. Pull out your floor mats too—set them aside on a clean surface like a mat rack or table (never directly on the ground where they’ll pick up more dirt).
Now it’s time for the real work: vacuuming. This isn’t a quick once-over situation. A thorough vacuum is the foundation of any deep interior car cleaning. Start with the headliner if it needs attention, using gentle strokes to avoid damaging the fabric. Then work your way down to the seats, paying special attention to the seams and crevices where crumbs love to hide.
Move the seats forward and backward so you can access every hidden spot. Use your vacuum’s crevice tool to get between seats, under pedals, along the edges of the console, and in all those tight spaces. For stubborn debris that won’t budge, try using a stiff brush to agitate the carpet fibers while you vacuum—this loosens embedded dirt and makes it easier to extract.
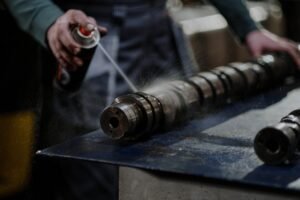
Here’s a pro tip: compressed air canisters are fantastic for blowing dirt out of impossible-to-reach spots like deep under the seats or from air vents. Just blast the debris loose, then vacuum it up. If you’re dealing with pet hair (we feel your pain!), check out our guide on pet hair removal for specialized techniques.
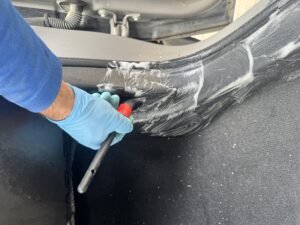
Step 2: Clean Hard Surfaces (Plastic, Vinyl, and Trim)
With all the loose dirt gone, you can finally see what you’re working with. Now it’s time to make those hard surfaces shine.
Grab your pH-neutral all-surface cleaner and a clean microfiber cloth. Here’s an important technique: spray the cleaner onto the cloth, not directly onto the surface. This gives you better control and prevents oversaturation, which can cause streaking or even damage to sensitive electronics.
Start wiping down your dashboard, center console, door panels, and steering wheel. Work in sections, using gentle circular motions. Don’t forget the less obvious spots like the area around the gear shift, cup holders, and the trim around the doors.
Air vents deserve special attention because they’re dust magnets. Take a soft detail brush and gently work it between the vent slats to dislodge trapped dust and grime. Follow up with a slightly damp microfiber cloth to wipe away what you’ve loosened. A great set of detailing brushes makes this job so much easier.
Once everything is clean and dry, consider applying a UV protectant to your plastic and vinyl surfaces. This creates a barrier against sun damage and helps prevent fading and cracking. Just a word of caution: avoid high-shine formulas on the dashboard. They look nice but can create dangerous glare while you’re driving. A satin or matte finish is much safer and still looks great.
Step 3: Shampoo Seats and Carpets
This is where you’ll really see dramatic results. There’s something incredibly satisfying about watching dirty water get lifted out of your upholstery!

First, identify what material you’re working with. Leather and fabric require completely different approaches, so take a moment to confirm what you have. We’ll focus on fabric seats and carpets here (we’ll cover leather in the next section).
For fabric seats and carpets, start by scanning for visible stains. Coffee spills, mystery spots, ground-in dirt—whatever you find, pre-treat it with your fabric and upholstery cleaner according to the product instructions. Let it sit for the recommended time to break down the stain.
Now comes the scrubbing. Apply your upholstery cleaner to a small section at a time—working in manageable areas prevents the cleaner from drying before you can extract it. Using an upholstery brush, scrub in a cross-hatch pattern (first horizontal, then vertical). This technique works the cleaner deep into the fibers where dirt hides.
Here’s where equipment makes a difference. If you have a carpet extractor, use it to pull out the dirty solution along with all that embedded grime. If you’re doing this without an extractor, use a clean, damp microfiber cloth to blot the area repeatedly. The key word is “blot”—don’t rub, as this can spread stains and damage fibers. Keep blotting with clean sections of the cloth until no more dirt transfers.
A critical warning: use as little water as possible during this process. Excess moisture can lead to mold growth and can actually cause old, previously cleaned stains to resurface from deep in the padding. It’s better to make multiple passes with less water than to soak everything once.
Allow plenty of time for drying—we’re talking several hours, or even overnight if you really shampooed heavily. Open all the doors, roll down the windows if weather permits, or set up a fan to speed things up. Never close up a damp car interior. If you’d rather skip this labor-intensive step, our professional car seat shampooing service handles it all for you.
Step 4: Safely Clean Sensitive Electronics and Screens
Modern cars are basically computers on wheels, and those screens and displays need special care. One wrong move with the wrong cleaner can permanently damage expensive electronics.
Your infotainment screens and instrument clusters often have special coatings—anti-glare, anti-fingerprint, or anti-reflective treatments that harsh chemicals will destroy. Ammonia-based cleaners are especially notorious for eating through these coatings.
Here’s the safest approach: turn off the screen first. Take a clean, soft microfiber cloth and lightly dampen it with distilled water or a screen-safe cleaning solution. Gently wipe the screen using minimal pressure. Think of it like cleaning your phone screen—you wouldn’t scrub aggressively, right?
Never spray cleaner directly onto the screen. Liquid can seep into the edges and damage the electronics inside. Always apply cleaning solution to your cloth first, and make sure the cloth is just barely damp, not wet.
If you notice stubborn fingerprints or smudges, resist the urge to press harder. Instead, make multiple gentle passes. Patience wins here. Remember: ammonia-free cleaners only, and when in doubt, distilled water is your safest bet.
Step 5: Detail Windows and Mirrors
You’re in the home stretch! Clean windows are the finishing touch that makes your entire deep interior car cleaning effort shine. Plus, clear visibility is a genuine safety issue, so this step is about more than just looks.
Grab your ammonia-free glass cleaner and two clean microfiber cloths. Why two? Because this two-towel method is the secret to truly streak-free glass.
Here’s how it works: spray your glass cleaner onto the first microfiber cloth—not directly onto the window. Wipe down the entire glass surface, making sure to reach into the corners and along the edges where grime accumulates. Pay special attention to the top edge of the window by rolling it down slightly so you can clean the part that’s usually hidden.
Immediately follow up with your second, completely dry microfiber cloth to buff the glass. This removes any remaining cleaner and prevents streaking. Wipe in one consistent direction—some people prefer vertical strokes, others horizontal. Pick one and stick with it for each window.
A streak-free shine isn’t just about the right products—technique matters just as much. Work in good lighting so you can spot any streaks or missed spots. If you do see streaks, don’t spray more cleaner. Instead, just buff again with a clean, dry section of your cloth.
And there you have it—the core steps of a thorough deep interior car cleaning. Your car should now look (and smell!) significantly better. But we’re not quite done yet. In the next section, we’ll tackle some advanced techniques for dealing with specific materials and those really stubborn problems that need extra attention.
Advanced Techniques for Specific Materials and Problems
Once you’ve worked through the basics of deep interior car cleaning, you might find yourself facing trickier situations. Maybe you’ve got a mysterious stain that won’t budge, or perhaps your leather seats need more than just a quick wipe-down. This is where a little extra know-how makes all the difference.

Different materials in your car’s interior need different approaches. What works beautifully on vinyl might damage leather. A stain remover that’s perfect for cloth seats could set a stain permanently on another surface. Understanding these differences—and knowing when to call in professional help—can save you time, money, and frustration.
The chemistry behind stain removal matters too. Some stains respond to one type of cleaner but resist another. And when it comes to odors, simply masking the smell with air freshener won’t cut it. You need to identify the source and treat it properly, whether that means using enzyme cleaners for organic smells or considering more advanced treatments like ozone therapy for persistent problems.
How to Clean Different Interior Materials
Your car’s interior is made up of several different materials, and each one deserves its own special attention. Think of it like cooking—you wouldn’t use the same technique for baking bread as you would for grilling steak, right?
Leather seats require the gentlest touch. Real leather has a protective clear coat that can be damaged by harsh chemicals or excessive scrubbing. Always use a pH-neutral leather cleaner specifically designed for automotive use. Apply it with a soft microfiber cloth, working in small sections. Gently wipe away dirt without rubbing too hard. Once the leather is clean and completely dry, apply a quality leather conditioner to keep the material supple and prevent those dreaded cracks from forming over time. This conditioning step is crucial—leather that dries out will crack and fade, especially in our sunny Utah climate. For a professional touch, check out our leather conditioning services.
Cloth upholstery is more forgiving but still needs care. The biggest mistake people make with fabric seats is using too much water. Over-saturating cloth can lead to mold growth underneath, and it can also cause old, forgotten stains to resurface from the seat cushion padding. When cleaning fabric, apply your upholstery cleaner sparingly and work it into the fibers with a brush. Then blot—don’t rub—with a clean microfiber cloth. If you’re using an extractor, make multiple slow passes to pull out as much moisture as possible. Leave windows cracked or doors open to ensure everything dries completely.
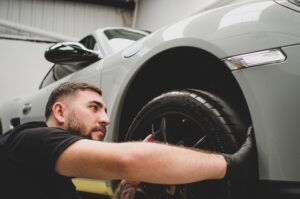
Plastic and vinyl surfaces are the easiest to maintain, but they still benefit from proper care. Use an all-purpose interior cleaner and a microfiber cloth to wipe down dashboards, door panels, and center consoles. After cleaning, consider applying a UV protectant to prevent sun damage and fading. Just avoid high-gloss products on the dashboard—that shine looks nice at first, but it creates dangerous glare while driving and attracts dust like a magnet.
Tackling stubborn stains during a deep interior car cleaning
Some stains are stubborn little troublemakers that refuse to disappear with regular cleaning. The key to beating them is understanding what you’re dealing with.
Coffee stains are common culprits in cars. Fresh coffee spills should be blotted immediately with a clean cloth. For dried coffee stains, mix a small amount of dish soap with warm water and gently work it into the stain with a soft brush. Blot repeatedly with a clean, damp cloth until the stain lifts.
Grease and oil stains need a different approach. These respond well to degreasers or specialized automotive spot removers. Apply the product, let it sit for the recommended time, then blot it away. Never rub oil stains—that just spreads them around.
Ink marks are particularly tricky. Rubbing alcohol on a cotton swab can work on some surfaces, but test it in an inconspicuous spot first. Leather and certain fabrics can be damaged by alcohol, so proceed carefully.
Here’s the golden rule for all stain removal: always blot, never rub. Rubbing pushes the stain deeper into the fibers and can damage the material. Blotting lifts the stain up and out.
Sometimes, despite your best efforts, a stain has simply become permanent. If the stain has been there for months or years, or if previous cleaning attempts used the wrong products, you might not be able to remove it completely. That’s when professional help makes sense. We’ve tackled some seriously stubborn situations—check out our tips for interior car detailing stubborn stains and odors.
Best Methods for Removing Odors
A clean-looking car that smells bad is still an unpleasant car. Odors don’t just happen—they have sources, and finding that source is step one.
Enzyme cleaners are your best friend for organic smells like spilled milk, pet accidents, or forgotten food. These cleaners contain bacteria that literally eat the organic material causing the smell. Apply the enzyme cleaner to the affected area, let it work for the recommended time (usually several hours), then blot it up. Don’t be tempted to use heat or other cleaners during this time—you’ll kill the helpful bacteria.
The baking soda method works well for general mustiness. Sprinkle baking soda liberally over carpets and seats, let it sit overnight, then vacuum it up thoroughly. Baking soda absorbs odors naturally without masking them.
Activated charcoal is another excellent odor absorber. Place a few bags of activated charcoal in your car and leave them overnight. They’ll pull odors from the air without adding any scent.
Smoke smell is particularly stubborn because it permeates everything. Start by thoroughly cleaning all hard surfaces—smoke residue clings to dashboards, windows, and door panels. Then shampoo all fabric surfaces. Don’t forget to clean the air vents with a detail brush and replace the cabin air filter. Old smoke particles trapped in the ventilation system will continue releasing odor even after you’ve cleaned everything else.
For severe odor problems that resist these DIY methods, professional odor elimination with ozone treatment might be necessary. Ozone generators create ozone gas that neutralizes odor molecules at the molecular level. This isn’t something to DIY—ozone can be harmful if not used properly—but it’s incredibly effective when performed by trained professionals.