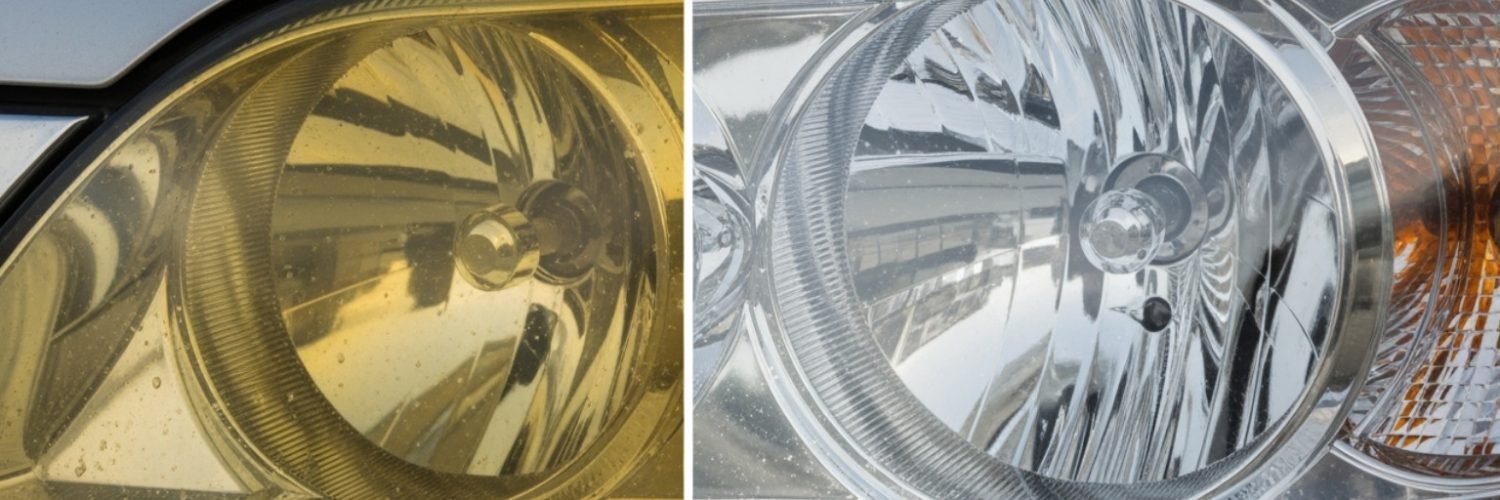
Knowing how to restore headlights means cutting away the oxidized top layer of the plastic lens and resealing it — clean and tape, wet sand, polish, then apply a UV sealant for clear, safe headlights that last.
Quick Answer: The 5-Step Method
- Clean & tape: wash the lens and mask off the surrounding paint.
- Wet sand: work up through 800 → 1500 → 2000 → 3000 grit, keeping everything wet.
- Clean again: rinse and dry so no grit is left behind.
- Polish: buff the lens back to clarity with polishing compound.
- UV seal: apply a UV-protective sealant — the step that makes it last.
That’s the whole method. The rest of this guide walks through each step in detail, what you’ll need, and how to keep your results from fogging back up.
Why This Method Works
Headlight lenses are made of polycarbonate plastic with a thin factory UV coating. Over time that coating breaks down and the plastic underneath oxidizes, turning yellow and hazy. Sanding removes the damaged layer; polishing restores optical clarity; and the new UV seal replaces the protection the factory coating used to provide. Skip the seal and the bare plastic simply oxidizes again — which is why so many DIY jobs fade fast.
What You’ll Need
- Car soap, water, and microfiber towels
- Painter’s tape to protect surrounding paint
- Wet/dry sandpaper in 800, 1500, 2000, and 3000 grit
- A spray bottle of water to keep sanding wet
- Polishing compound and an applicator or foam pad
- A UV-protective sealant or clear coat made for headlights
You can buy these separately or as a bundle. If you’d rather grab everything in one box, we compare store-bought options in our review of whether restoration kits are worth it.
How to Restore Headlights: The 5 Steps in Detail
Step 1 — Clean and tape the lens
First, wash each headlight with car soap and dry it fully. Then tape off the paint and trim around the lens on all sides. This matters because wet sanding will scratch any paint it touches, and the tape gives you a clean, worry-free edge to work up to.

Step 2 — Wet sand from coarse to fine
Next, keep both the lens and the sandpaper wet the entire time. Start with 800 grit to cut the yellowed layer, then step up through 1500, 2000, and 3000. Sand in one direction, rinse often, and don’t rush. The lens will look cloudy and dull after this stage — that’s exactly right, because polishing brings the clarity back.
Step 3 — Clean off all the grit
After sanding, rinse thoroughly and wipe the lens dry with a clean microfiber. Any leftover grit will drag through your polish and leave new scratches, so take a moment to check the surface in good light before moving on.
Step 4 — Polish back to clear
Now apply polishing compound and buff the lens, either by hand or with a machine polisher. Work it in until the plastic turns from cloudy to transparent. In addition to clarity, polishing smooths the surface so the sealant bonds evenly in the final step.
Step 5 — Apply the UV seal
Finally, wipe the lens with alcohol so it’s clean and oil-free, then apply your UV sealant in thin, even coats. This is the step most people skip — and it’s the difference between results that last months and results that last years. Let it cure fully before driving in rain or washing the car.

Sealing and Maintenance
The seal is what protects your work, so treat it well. Wash your headlights along with the car, avoid harsh solvents on the lens, and reapply a UV sealant roughly once a year to keep the protection topped up. Because Utah gets intense high-altitude sun, that yearly refresh matters more here than in cloudier climates — you can read why headlights oxidize to understand the UV connection.
DIY vs. Professional Restoration
DIY is satisfying and cheap, but it takes time and a steady hand. Here’s an honest comparison so you can choose the right path.
| DIY | Professional | |
|---|---|---|
| Cost | $15–$50 | $80–$140 |
| Time | 1–3 hours | ~30–60 min (we do it) |
| Result quality | Good with care | Consistently crisp |
| Longevity | 6–12 months if sealed | 1–3+ years |
| Effort | All yours | None |
If the job feels like more than you want to take on, our professional headlight restoration comes to you and includes the seal. Want to see the numbers first? Here’s a full breakdown of what restoration costs.
Common Mistakes to Avoid
- Skipping the UV seal. Bare polished plastic re-oxidizes within months.
- Dry sanding. It gouges the lens and clogs the paper — always keep it wet.
- Not taping the paint. One slip with 800 grit and you’ve scratched the fender.
- Stopping at too coarse a grit. Jumping from 800 straight to polish leaves a hazy finish.
- Relying on toothpaste. It’s a temporary trick, not a restoration — see how to fix cloudy, foggy headlights for what actually lasts.
Frequently Asked Questions
Can I restore headlights without sandpaper?
Light haze can sometimes be improved with polish alone, but real, yellowed oxidation needs sanding to remove the damaged layer. For anything more than a faint cloud, the wet-sanding steps are what deliver a clear result.
How long does the DIY process take?
Plan on one to three hours for a pair, depending on how oxidized the lenses are and whether you sand by hand or machine. Curing the sealant afterward adds a little more time before the car is ready for rain or a wash.
Do I really need the UV sealant?
Yes. Without it, the freshly sanded plastic has no protection and will yellow again within months. The seal is the single most important step for making your restoration last.
Will DIY results look as good as a pro job?
With patience and the full grit progression, DIY results can look excellent. Professionals tend to get more consistent clarity on heavy oxidation and finish faster, but a careful home job is very close.
Clear Headlights, Your Way
You now know how to restore headlights the right way — clean, sand, polish, and seal. Follow the steps, don’t skip the UV coat, and you’ll be rewarded with clear, safe lenses. If you’d rather have it handled, our professional headlight restoration across Utah County comes to your driveway.
Book online or call 385-375-7652 and skip the sanding entirely.